Phew, that's a mouthful! Working with AKS sometimes is. However, I can assure you that this approach to securing your applications in your Kubernetes cluster is worth it. The advantages to have a secretless solution are many:
- No secrets are lost in the wild 🐅 The need to send secrets to others disappears
- Configuration is less cluttered and less danger of someone accidentally pushing secrets to a repository
- Let secrets be stored where they are safe 🔒 (i.e key vault)
This guide will utilize the following utilities to access your Azure services:
- Azure AD Pod Identity
- Azure.Identity token credentials
- Azure user-managed identities
Install AKS with managed identity
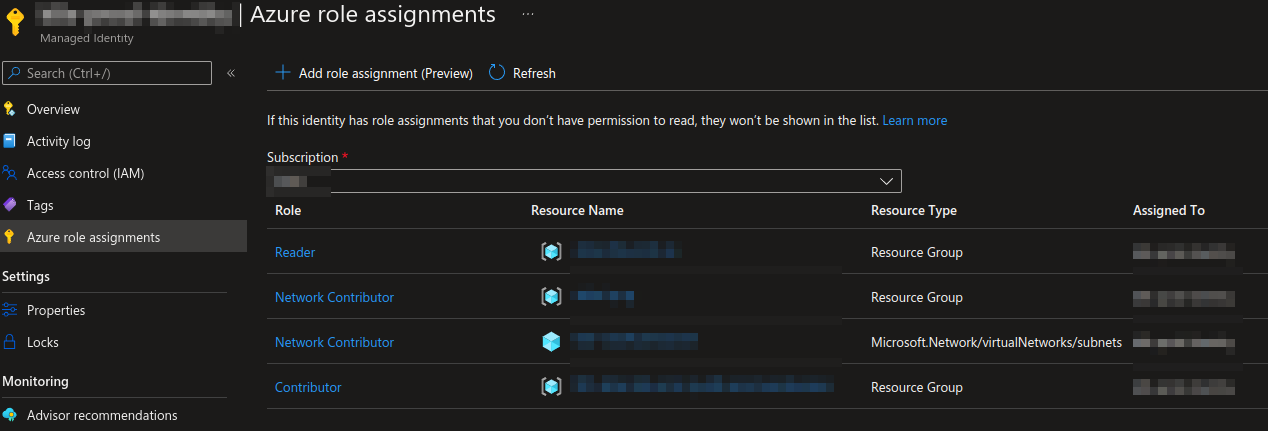
It's possible to provision a cluster with a managed identity attached to it. This eliminates the need to have secrets formerly required by AKS. We avoid having to deal with the renewal of service principles because managed identity handles the renewal automatically. We create the Kubernetes cluster with az aks create command and provide an--enable-managed-identity flag. This managed identity should have a network contributor role for Microsoft.Network/virtualNetworks/subnets and a reader role for the resource group containing the AKS.
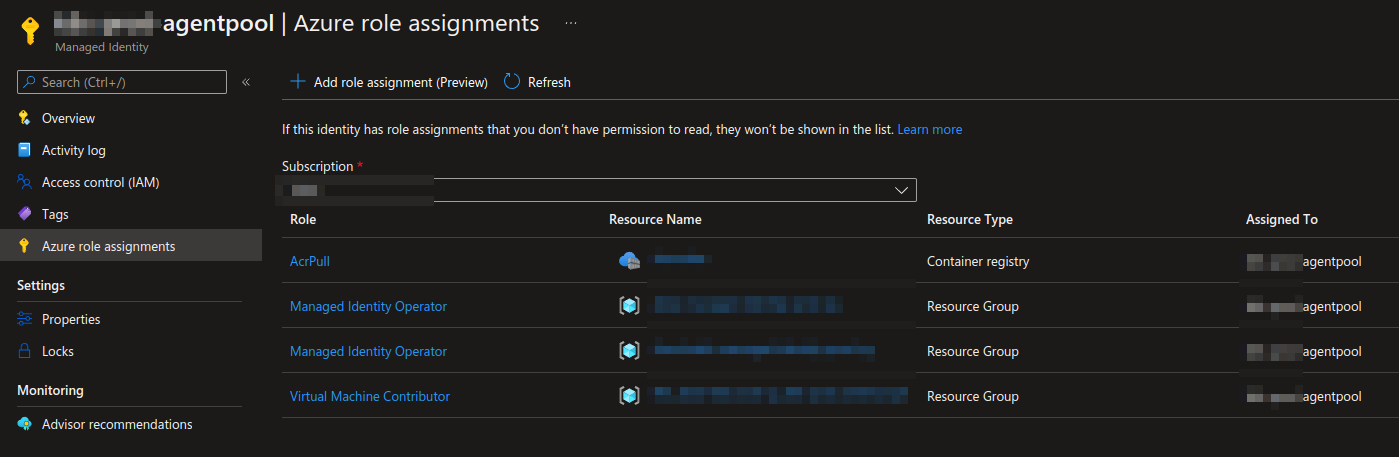
Some roles tied to the "kubelet identity" also need to be set. You can use --assign-kubelet-identity flag to specify your own kubelet identity. Set a Managed identity operator role for the managed identities. I have all managed identities in a resource group and assign the kubelet identity to the group. We also need to attach a virtual machine contributor to a managed cluster resource group.
When creating the cluster with the managed identity flag, the managed identity should look like this.
When we have set the correct roles in kubelet identity, the managed identity should look like this.
Set up Azure user-managed identities
The Microsoft docs describe it best: "A common challenge for developers is the management of secrets and credentials used to secure communication between different components making up a solution. Managed identities eliminate the need for developers to manage credentials". Managed identity utilizes Azure role assignments to access resources. The connection string containing credentials is dead. Let's create a user-managed identity with bicep:
resource managedIdentity 'Microsoft.ManagedIdentity/userAssignedIdentities@2018-11-30' = {
    name: 'my-great-service'
    location: 'westeurope'
}
output principalId string = managedIdentity.properties.principalId
This gives us a dedicated managed identity for the service "my-great-service". We also output a principle id to be able to assign role assignments to Azure services that we want "my-great-service" to communicate with. This is how to assign a "KeyVaultSecretsUser" role to a managed identity when accessing a key vault:
resource keyvault 'Microsoft.KeyVault/vaults@2021-06-01-preview' existing = {
    name: 'my-great-keyvault'
}

var keyVaultSecretsUser = subscriptionResourceId('Microsoft.Authorization/roleDefinitions', '4633458b-17de-408a-b874-0445c86b69e6')

resource keyvaultRoleAssignment 'Microsoft.Authorization/roleAssignments@2020-08-01-preview' = {
    name: guid(resourceGroup().id, 'my_great_service_key_vault_secrets_role')
    scope: keyvault
    properties: {
        principalId: pricipalId
        principalType: 'ServicePrincipal'
        roleDefinitionId: keyVaultSecretsUser
    }
}
Install and set up Azure AD Pod Identity
Azure AD Pod Identity is a way to connect your services in Kubernetes to Azure-managed identities through Kubernetes primitives. This bridges the authentication between the cluster and your Azure services. Install the Azure AD Pod Identity by applying the correct configuration.
After installing the configuration, we can start creating the resources specific to Azure AD Pod Identity and applying the attributes needed to bind an Azure AD Pod Identity to a deployment.
//aadpodidentity.yaml
apiVersion: "aadpodidentity.k8s.io/v1"
kind: AzureIdentity
metadata:
    name: my-great-service-identity
    spec:
        type: 0
        resourceID: /subscriptions/<subscriptionId>/resourcegroups/my-great-service-rg/providers/Microsoft.ManagedIdentity/userAssignedIdentities/my-great-service-pod-identity
        clientID: <principalId from managed identity>

---

//aadpodidentitybinding.yaml
apiVersion: "aadpodidentity.k8s.io/v1"
kind: AzureIdentityBinding
metadata:
    name: my-great-service-identity-binding
    spec:
        azureIdentity: "my-great-service-identity"
        selector: "my-great-service"
This resource creates a link between the Azure managed identity and our pod. A minor detail is that we have to supply a managed identity principal id. The only thing we need to do is to tie this binding to a deployment.
//deployment.yaml
apiVersion: apps/v1
kind: Deployment
metadata:
    name: my-great-service
    spec:
        replicas: 1
        selector:
            matchLabels:
                ...
                aadpodidbinding: my-great-service
                template:
                    metadata:
                        labels:
                            ...
                            aadpodidbinding: my-great-service
Our deployment has a binding to the pod identity and can now connect to Azure services. That's all you need to set up in Kubernetes.
Replaced with Azure AD Workload Identity
Azure AD Pod identity is being deprecated and is going to be replaced with Azure Workload Identity. This approach is simpler to use and deploy and overcomes several limitations in Azure AD Pod Identity. Managed identity support has been rumored to come out soon. The approaches in this tutorial tied to Azure AD Pod identity will not last for long.
Connect the application to an Azure service
Most Azure SDKs offer a way to use Azure.Identity to authenticate against the Azure Cloud services. A TokenCredential allows us to use a number of different authentication options. In our case, the ManagedIdentityCredential in production and AzureCliCredential locally. You can also use DefaultAzureCredential to go through a chain of authentication methods.
Provides a default TokenCredential authentication flow for applications that will be deployed to Azure. The following credential types if enabled will be tried, in order:
- EnvironmentCredential
- ManagedIdentityCredential
- SharedTokenCacheCredential
- VisualStudioCredential
- VisualStudioCodeCredential
- AzureCliCredential
- InteractiveBrowserCredential
It's also possible to create a ChainedTokenCredential with multiple token credentials. When connecting to a key vault it might look something like this.
config.AddAzureKeyVault(new Uri("https://my-great-keyvault.vault.azure.net/"), new DefaultAzureCredential());
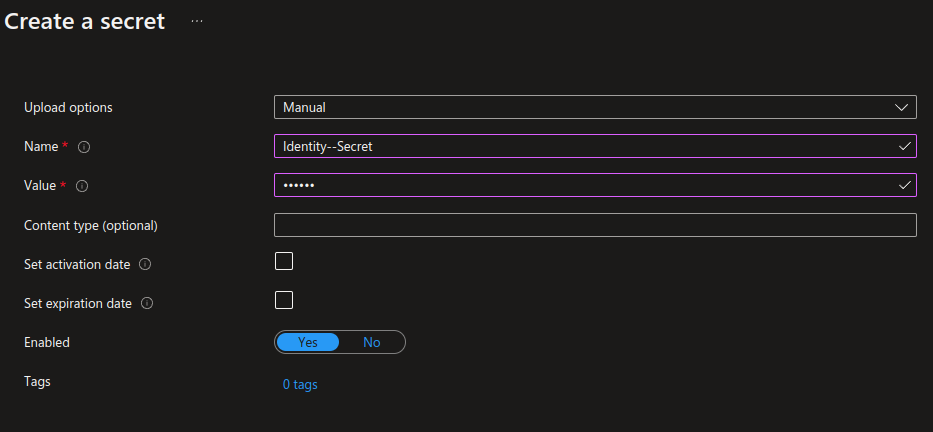
The application should be able to connect to the key vault without a traditional connection string. The reference is entirely secretless and all of the heavy lifting is done with the DefaultAzureCredential. Now we can easily retrieve our secrets from the key vault as well. This is how to map properties inside the key vault to an app config. You can resolve to any level of the app config by using a "--" delimiter. Resolving a config property that looks like this:
{ "Identity":{ "Secret": "very secret!" } }
The path In the key vault we simply name the secret "Identity--Secret" to resolve it correctly. Retrieving it from configuration in code: `["Identity:Secret"]`.
Other ways to use managed identity
There is many other ways to achieve secretless connections. Check out Passwordless connection string to Azure SQL database using Azure managed identity by Hallstein Brøtan or Azure app configuration with no secrets using Azure managed identity by Karl Solgård.
Secretless is the way to go! It's such a nice experience to not have to deal with user secrets that need to be rotated. Development is also easier. Just run the solution. No need to run scripts to load user secrets.