While on a company outing with NOVACARE to a nearby arcade pub, I came across a table with a built-in arcade system. I thought to myself that this would make a great piece of furniture in my house. I already own a Raspberry pi 3 and I have a spare monitor that I don't use. So I went straight to eBay and started ordering some stuff.
Building a table
First of all, we need to do some woodworking. We're building a table after all. We're going to need some parts to make an arcade table.
- Raspberry pi 3 B+
- SD-card with RetroPie distro installed
- Some MDF-boards
- Cabinet Kits Joystick + Chrome LED Buttons
- An old 24" monitor
- Custom cut glass
- Micro USB power adapter
- Power strip
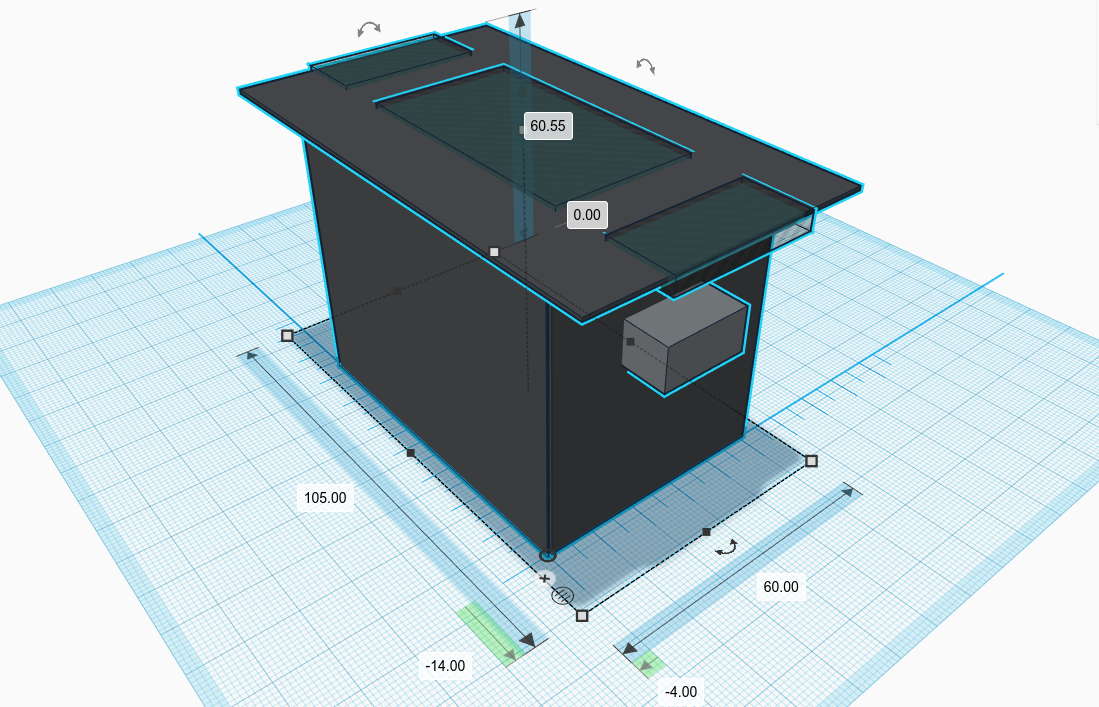
We need to figure out the measurements for our boards. I did this by feel, but feel free to use my measurements if you want to recreate this.
- Long sides: 58x73cm
- Short sides: 58x50cm
- Top: 60x105cm
- Controller boxes: 18x9x9cm
- Cutout in the top for monitor: 53x30cm
- Cutout in the top for controller box: 10x30cm
- Four legs for support: 60cm
Assembly
- Assembly is basically to screw everything together with wooden screws. Attach legs to the long sides and drill the sides to the short sides.
- Make sure to paint the boards in the color you want.
- The holes in the top need to be cut out. After cutting out the top, we need to have a mount to hold the screen. I took some leftover wood scraps and made a simple mount to hold the screen in place. I also peeled the excess plastic off the screen to make it smaller.
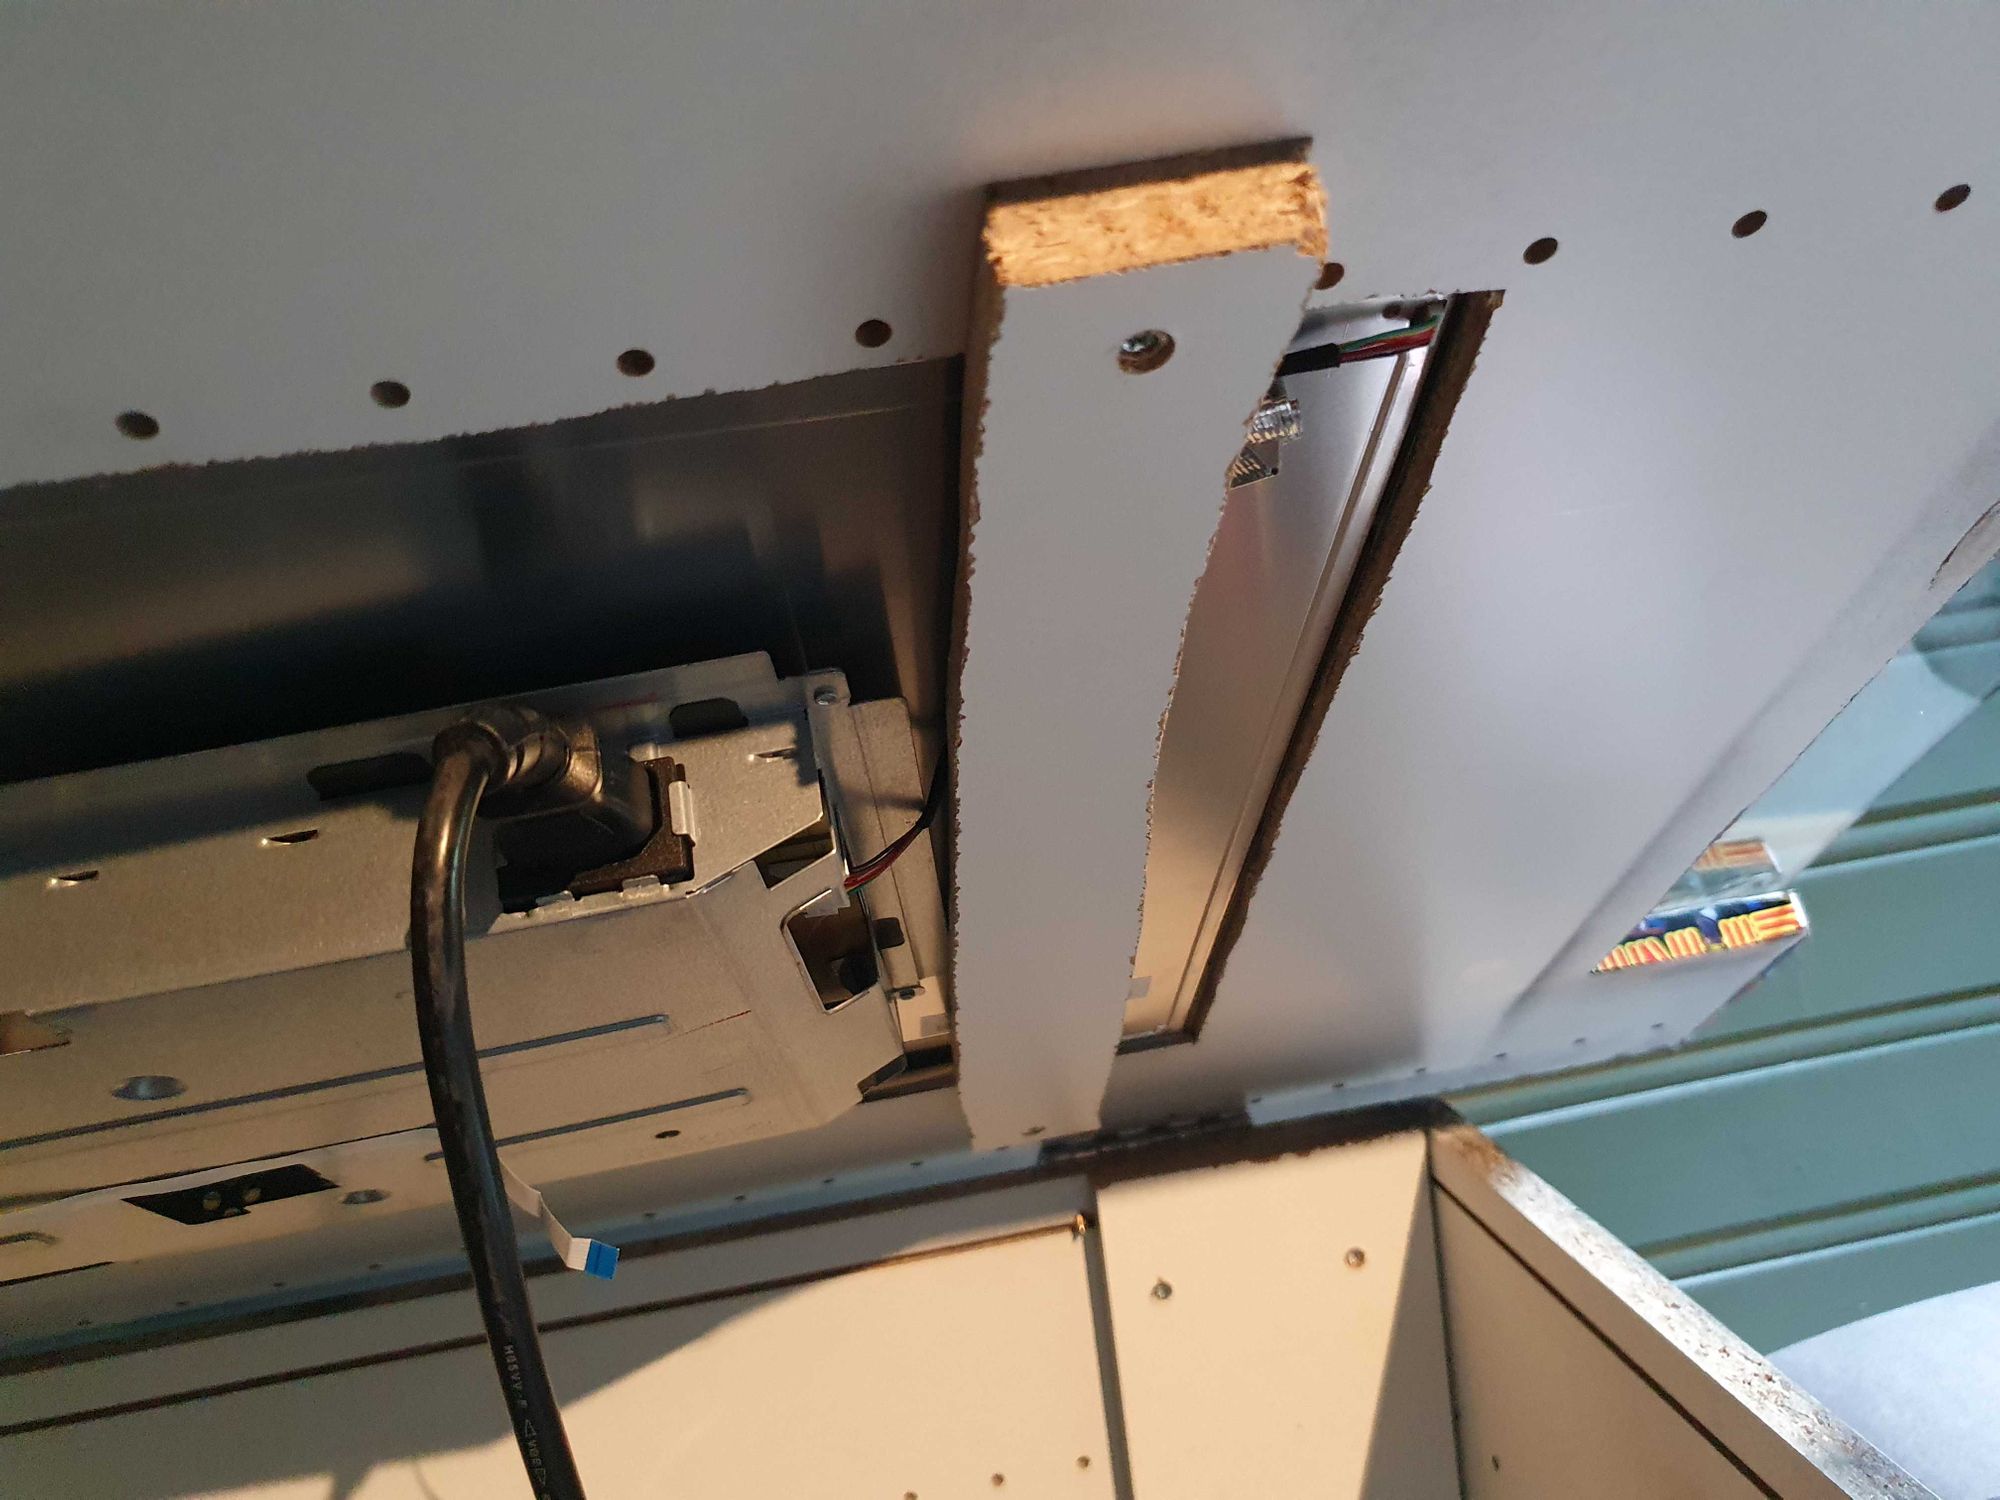
- The controller boxes need holes for joysticks and buttons. Make sure to use a drill bit that creates a 1-inch hole.
- Holes for controller boxes need to be cut out and can be placed at the desired height. Feed cables through this hole and to the Raspberry Pi. I also drilled a hole for the start button on the side panel.
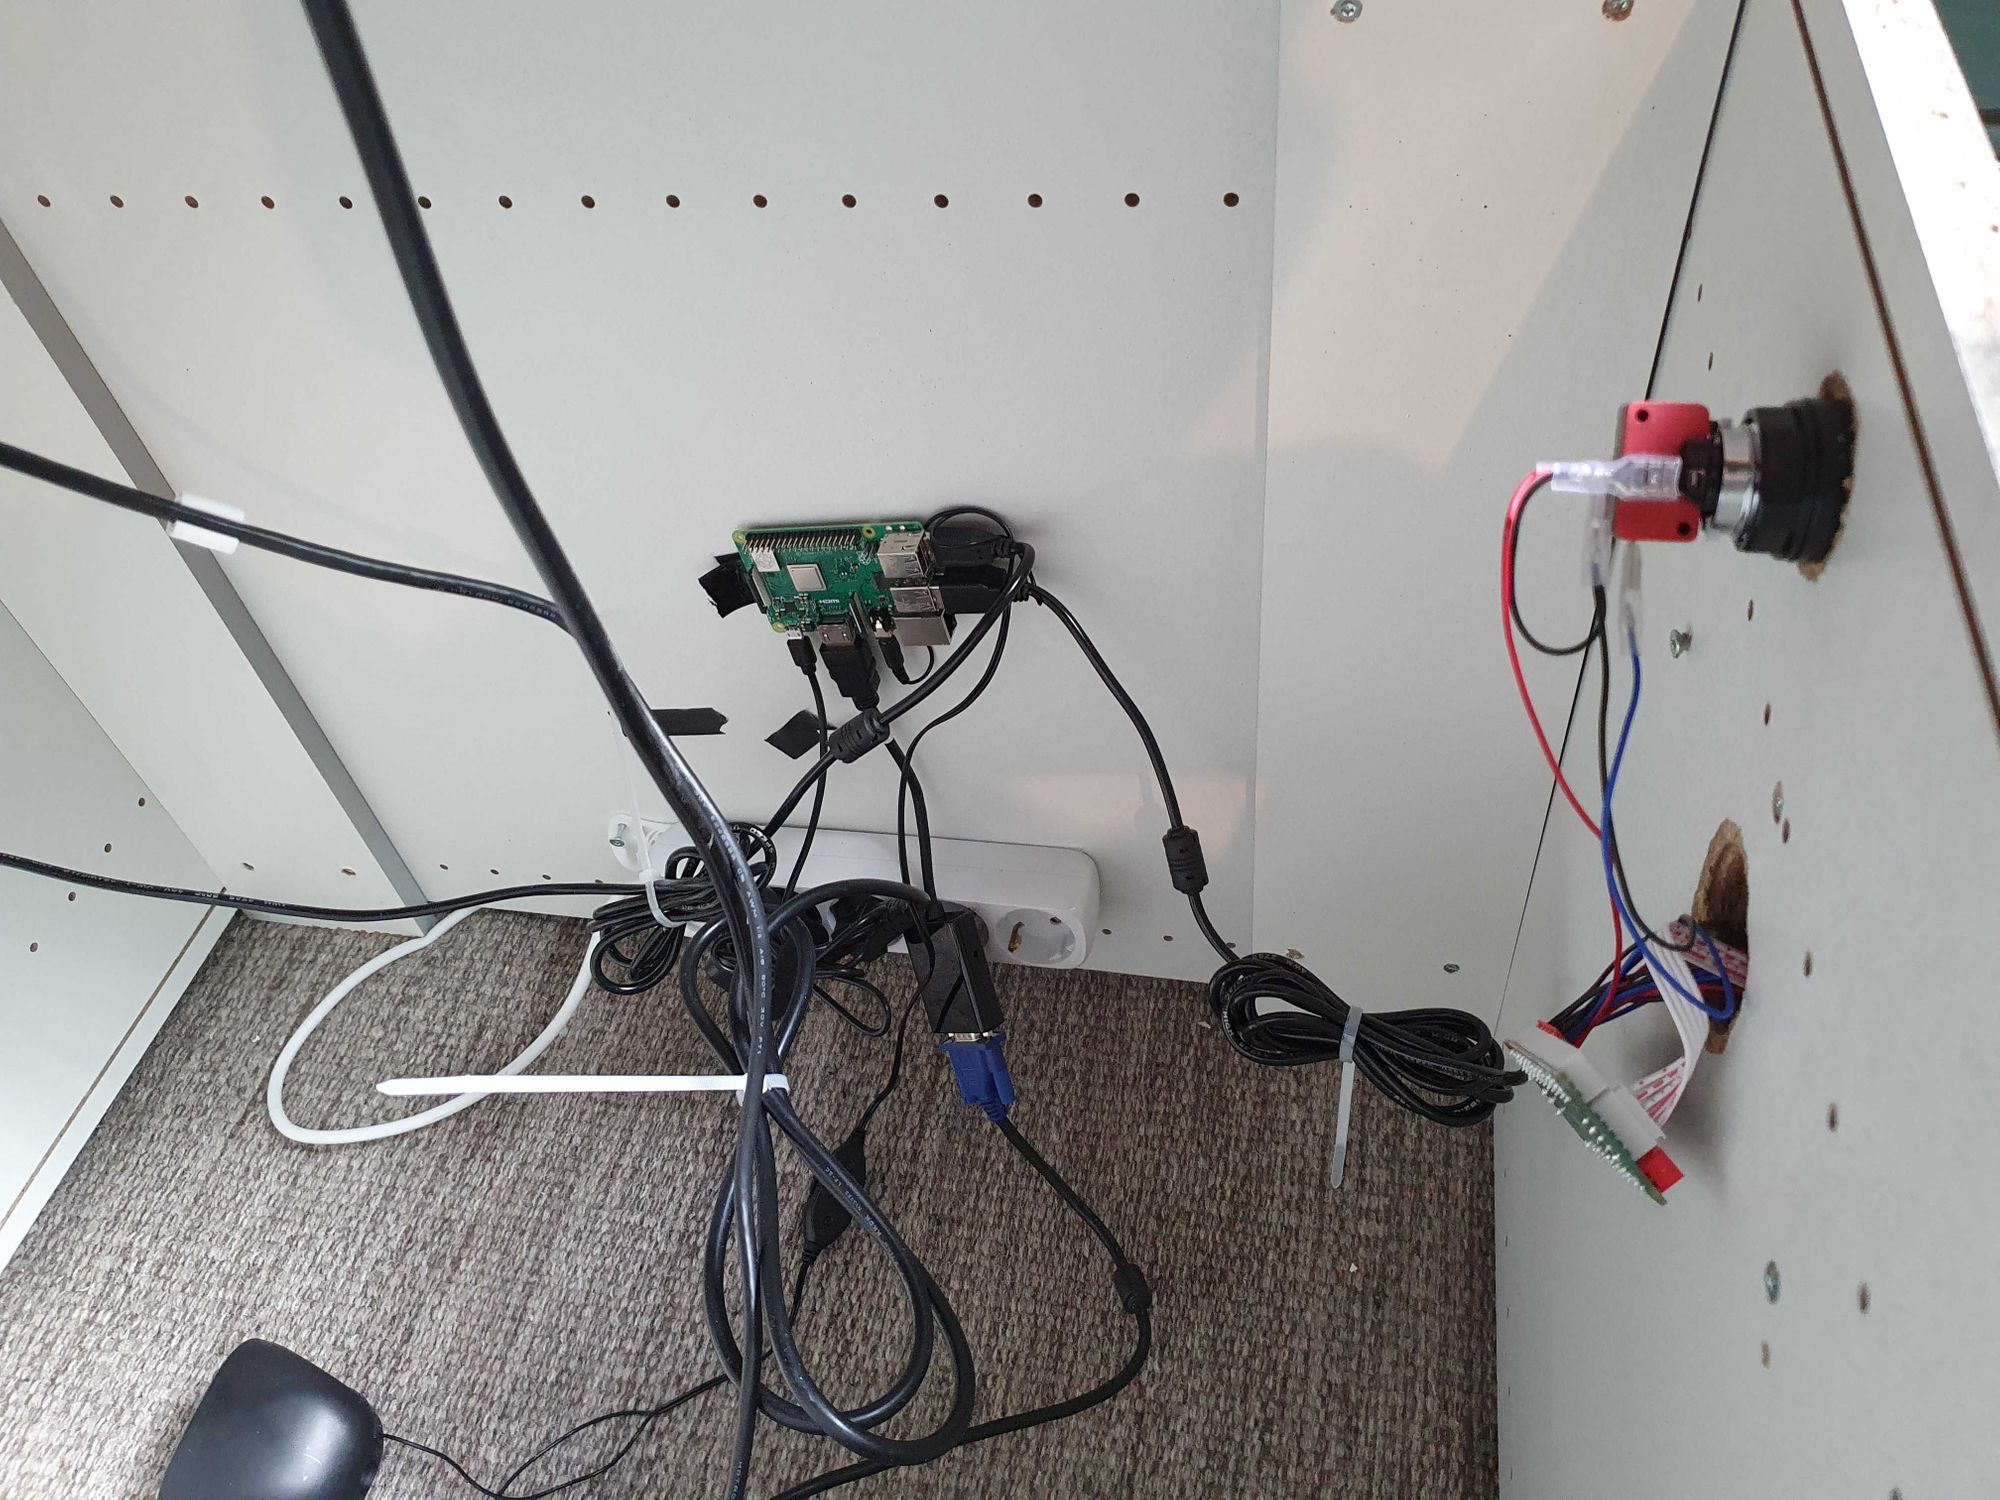
- This is what the insides look like. Controllers, speakers, and screen all connected to the Raspberry Pi. All power is provided by the power strip. The Pi and power strip is fastened with velcro.
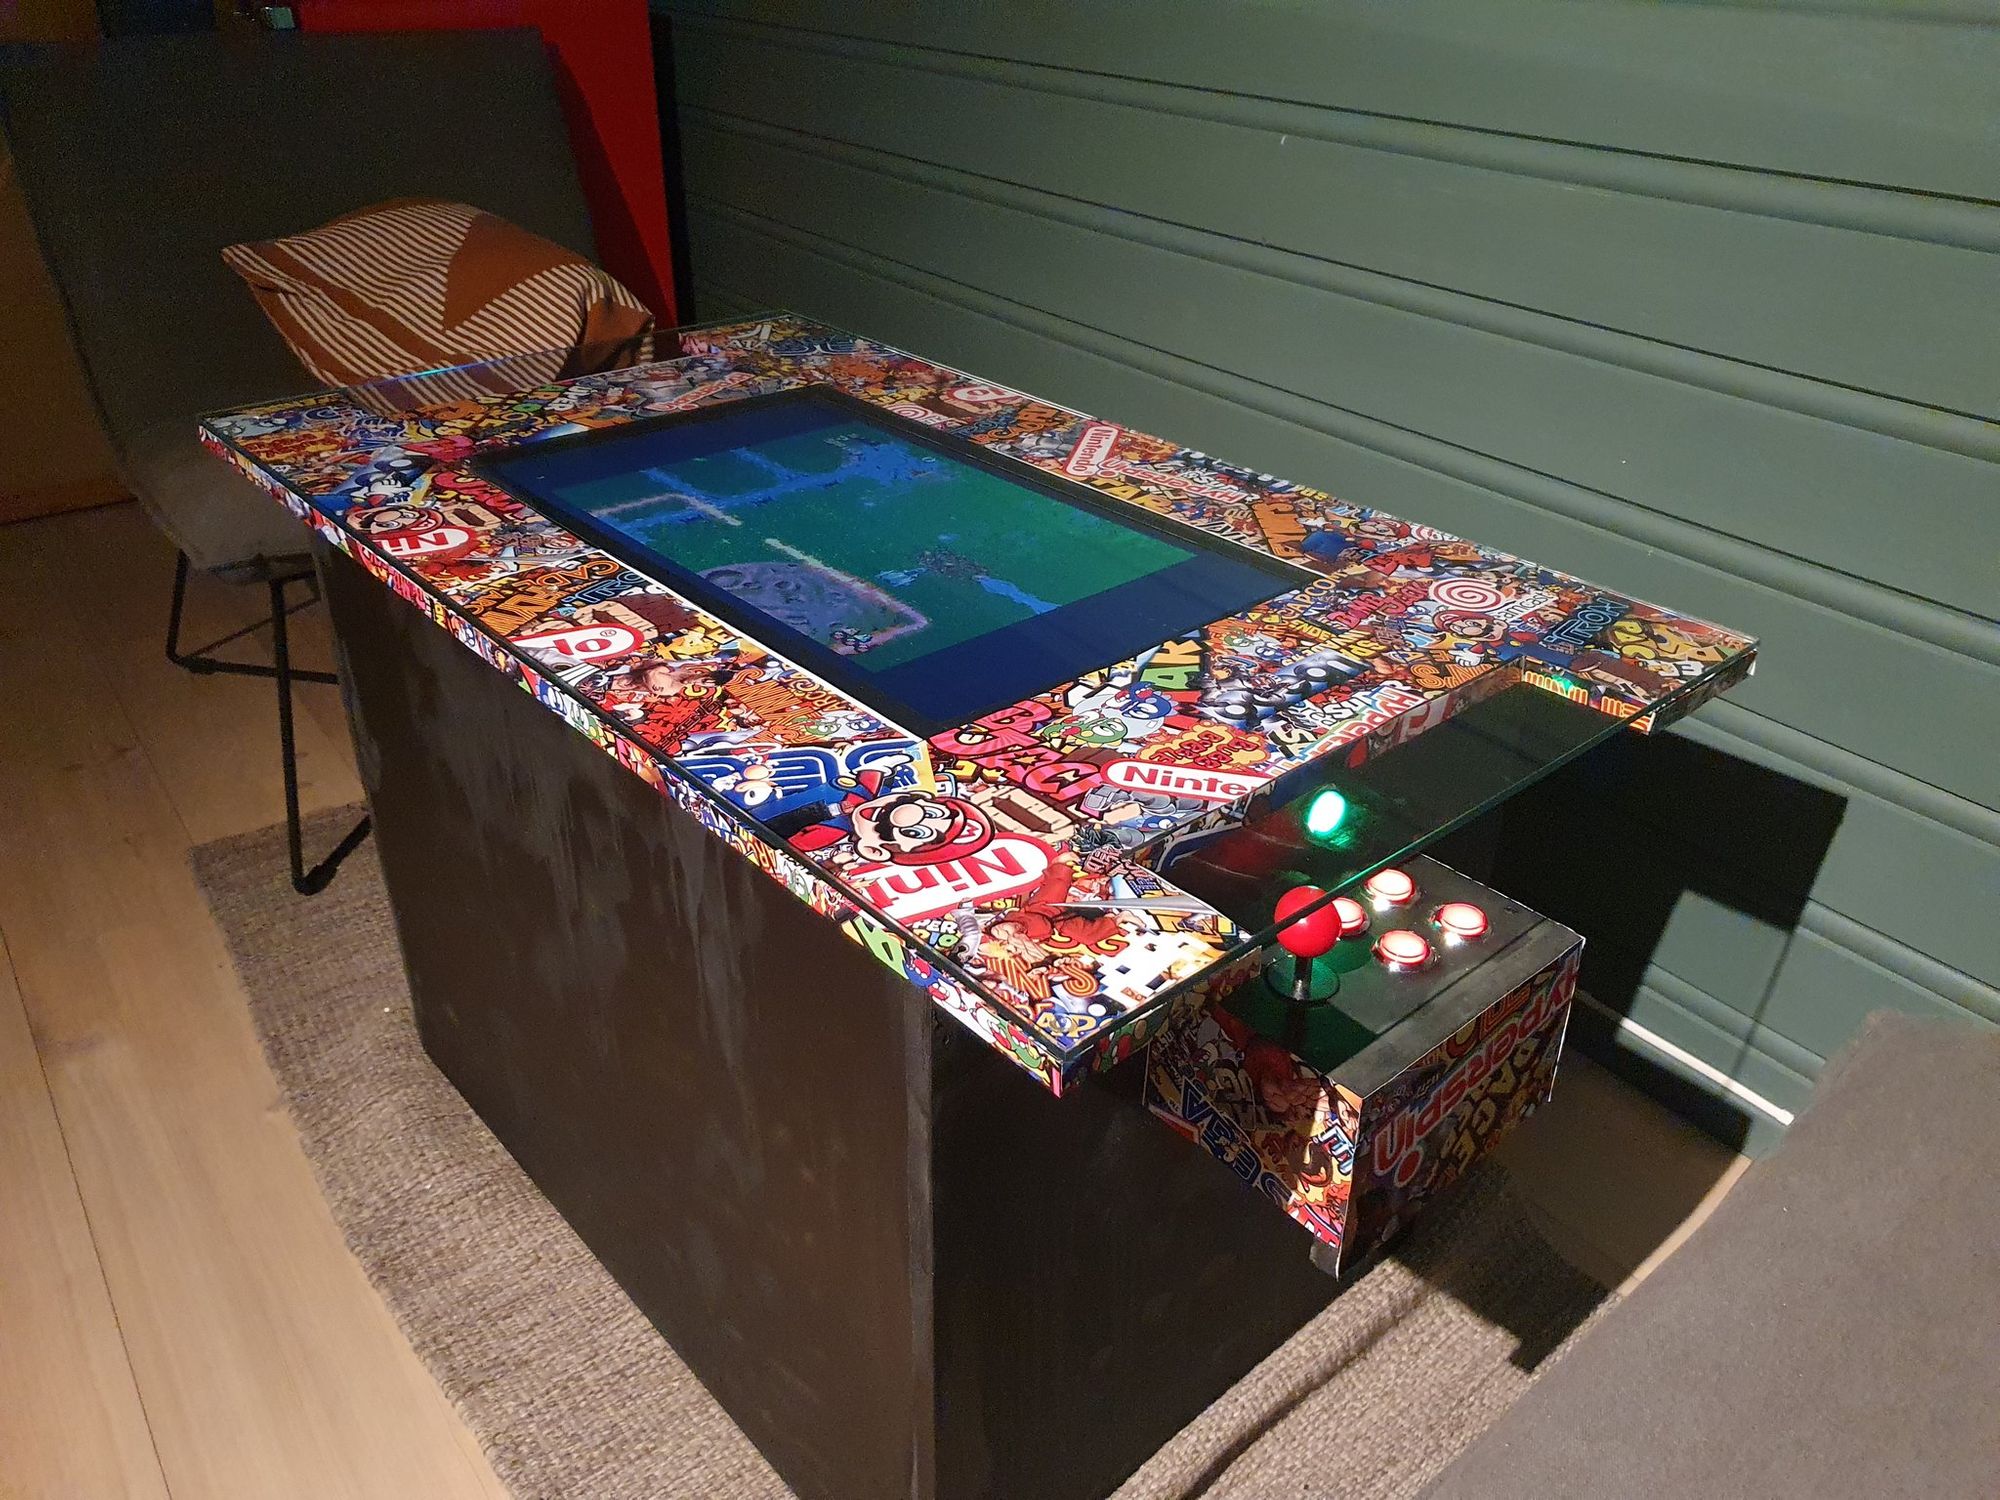
- To add some flavor, we wrap some stickers on the top and controller sides.
- To fasten the top, I drilled in some hinges on one side and hooks in the other.
The finished machine looks like this.
Now we're ready to configure the machine. This is the easiest part of the entire build. I recommend following their documentation.
- Mount the RetroPie image onto your Raspberry pi following this guide using Etcher.
- Once booted up, you need to configure the controllers. This should pop up during the first boot up.
- You can load ROMs with USB stick by following this guide.
Split-screen support
The initial orientation of the screen will be in landscape mode. This is an awkward orientation to play in. We can apply a GLSL shader to avoid this issue. Luckily someone on Reddit solved this issue. This is what that looks like:
Got my arcade cocktail table working with split screen using glsl shaders 🎊 Here playing some Kirbys Dream Course against a worthy opponent ⛳ #arcadegames #raspberrypi pic.twitter.com/F9P931Hgbk
— Karl Solgård (@KarlSolgard) March 31, 2020