In Contentful, the easiest way to change your content model is through the web app on app.contentful.com. This is pretty straightforward if you are doing basic changes like adding a new text field.
However, if you are planning more complex changes, migration scripts are probably the best way forward. By using migration scripts, you can add and delete fields like you can in the web app, and you can also create and insert content into existing entries.
In this blogpost, I will show you how you can use the Contentful CLI in a migration script to copy content from one entry to another.
The task: Transform the 'blogpost' content type by moving the image asset from one entry to another
I have the following content model 'blogpost':
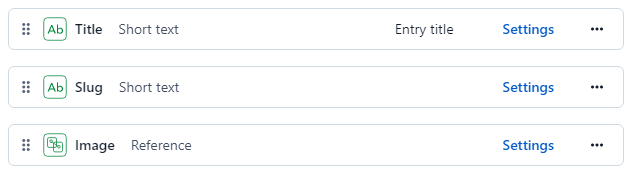
The 'image' field above is a reference to another content type 'image', which looks like this:
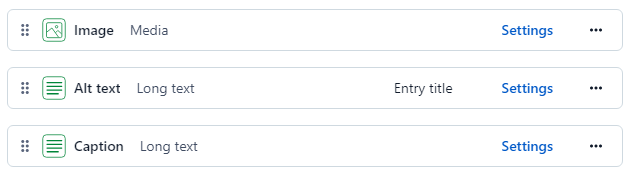
I have pretty basic needs for my blog. This content model with references two levels deep just to display an image, feels too complex. I want to add a new field 'mainImage', replacing 'image':
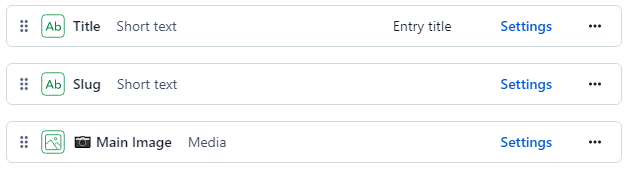
The 'mainImage' field is a link to an asset (an actual image file), the same asset linked from the child 'image' entry in the original content model.
To summarize what we are going to change
Current model:
entry 'My blogpost'
  → field 'image'
    → link to entry 'My image entry'
      → field 'image'
        → link to asset 'My image asset'
Transform to:
entry 'My blogpost'
  → field 'mainImage'
    → link to asset 'My image asset'
Before we begin, create a new environment
By working with a new Contentful environment, you don't risk anything happening to your existing data.
Install the Contentful CLI, if you don't have it already:
> npm install -g contentful-cli
Log in to Contentful and select which space to use:
> contenful login
> contentful space use "your-space-id"
Add a new environment called "feature-1".
> contentful space environment create --name "feature-1" --environment-id "feature-1"
Start scripting!
The migration script is in javascript, and the Contentful CLI has several useful functions built in to create migrations. In this guide we will use these methods:
- editContentType()
- transformEntries()
You can find more examples in Contentful's documentation:
https://www.contentful.com/developers/docs/tutorials/cli/scripting-migrations/
To be able to copy information from one entry to another, we also need to use the Contentful API directly. We can do that with the method
- makeRequest()
How to run a migration script
Before you run your script, remember to log in to Contentful and to select the correct space (see above for how). Then run the migration script:
> contentful space migration --environment-id 'feature-1' my-migration.js
This is not dangerous. When you run the script, you will first get an overview of the changes that will happen, and then you need to confirm that you actually want to apply these changes.
The migration script
// This is how to start building a migration script.
// I need the makeRequest method, so include that:
module.exports = function (migration, { makeRequest }) {

    // Edit content type 'blogpost', add new field 'mainImage'.
    // Field 'mainImage' is a link to an asset, an image file.
    const blogpost = migration.editContentType('blogpost');
    blogpost
        .createField('mainImage')
        .name('📷 Main Image')
        .type('Link')
        .linkType('Asset')
        .validations([
            {
                'linkMimetypeGroup': ['image']
            }
        ]);

    // Next transform every entry of type 'blogpost'.
    // Use data from the existing field 'image' and insert into
    // the newly created field 'mainImage'.
    migration.transformEntries({
        contentType: 'blogpost',
        from: ['image'],
        to: ['mainImage'],
        transformEntryForLocale: async (from, currentLocale) => {

            // If the 'image' field of the 'blogpost' entry is empty,
            // ignore the entry and skip to the next one.
            if (from.image === null || typeof (from.image) === "undefined") {
                return;
            }

            // Console log is really, really useful to figure out
            // what the objects you are working with look like.
            // Try this for example:
            console.log('# from.image:');
            console.log(from.image);

            // The 'image' field contains a link to a content type
            // called 'image'. Get the id of that 'image' entry.
            const imageEntryId = from.image[currentLocale].sys.id;

            // I want to find the image asset in the linked 'image'
            // entry. To get that, I need to request it from the
            // Contentful API directly:
            const imageEntry = await makeRequest({
                method: 'GET',
                url: `/entries/${imageEntryId}`
            });

            // Better log some more to see what the 'image'
            // entry actually looks like:
            console.log('# imageEntry:');
            console.log(imageEntry);

            // Seems what I'm looking for is in the 'image' field
            // of the 'image' entry. Sorry for the lack of imagination
            // in naming fields and content types.
            console.log('# imageEntry.fields[\'image\']:');
            console.log(imageEntry.fields['image']);

            // Let's copy the image asset link from the 'image' field
            // in the 'image' entry back to the 'mainImage' field in
            // the 'blogpost' entry.

            // I'm also getting rid of localization for image assets,
            // which is why I'm only copying the image asset for the current
            // locale.
            return {
                mainImage: imageEntry.fields['image'][currentLocale]
            };
        }
    });

    // Disable the old field for now so editors will not see it.
    blogpost.editField('image').disabled(true)
}
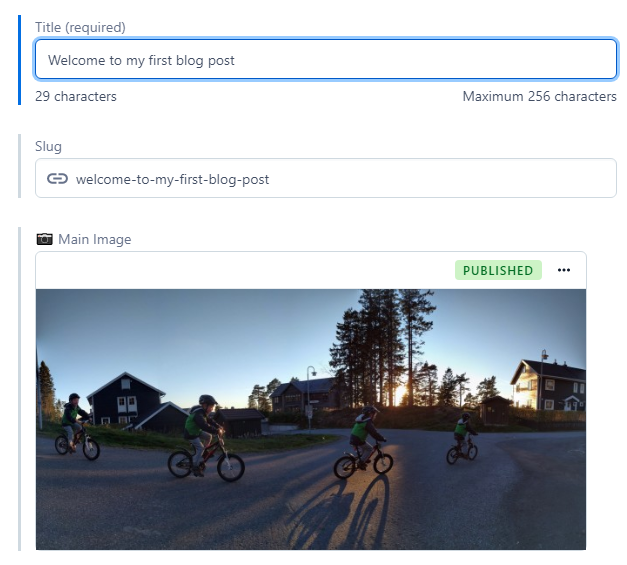
Et, voilà! Run the script and confirm, and we can now add images to blogposts directly, without having to create an image entry every time:
Go live with the updated Contentful environment
When you are happy with your changes, and have made sure that any applications that get content from Contentful are updated to handle the new content model, switch environment.
Go to the Environment settings:
https://app.contentful.com/spaces/[your-space-id]/settings/environments
Click "Change alias target" next to the "master" environment to point it to your new environment. If you followed this blogpost to the letter, it is called "feature-1".